BeepBlock
Theory
A speaker can produce sounds waves by vibrating back and forth at various frequencies.
Frequency is measured in Hertz (Hz) which is the number of vibrations per second.
Humans typically can hear from about 20Hz - 20,000Hz
The BrainBloX can use a BeepBloX to create tones between 31Hz - 65,535Hz
To produce sounds (other than beeps/tones) such as recordings, music, and voice requires
a MemoryBloX (SD card) connected to the BrainBloX.
BeepBloX + MemoryBloX = BeepBloX FX
Assembly
- Required Materials
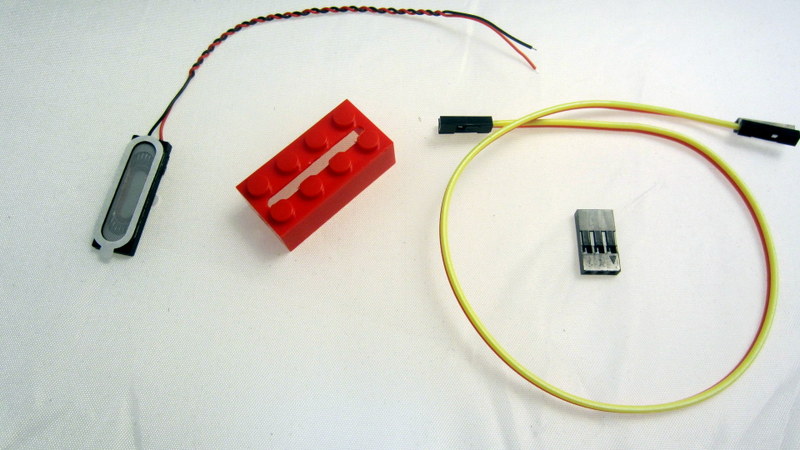
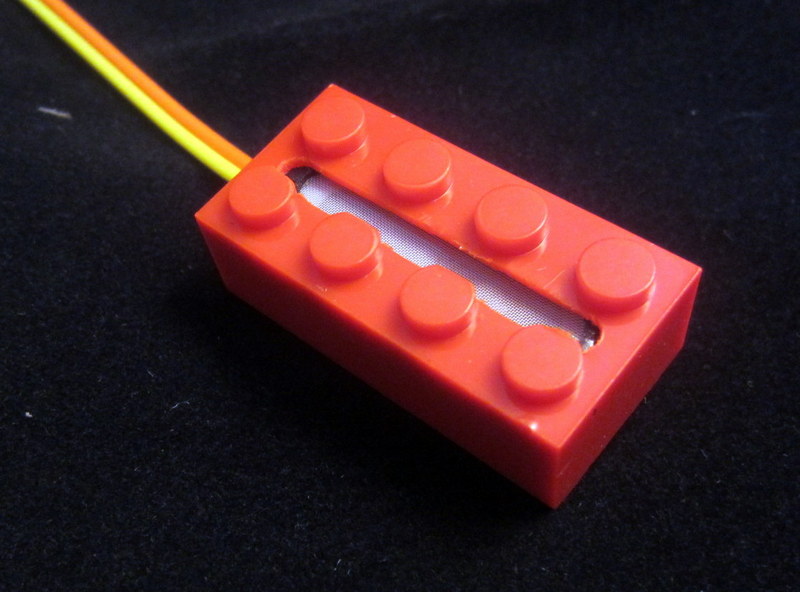
- Speaker
- 2x4 Block
- Wire 2
- 3 pin housing
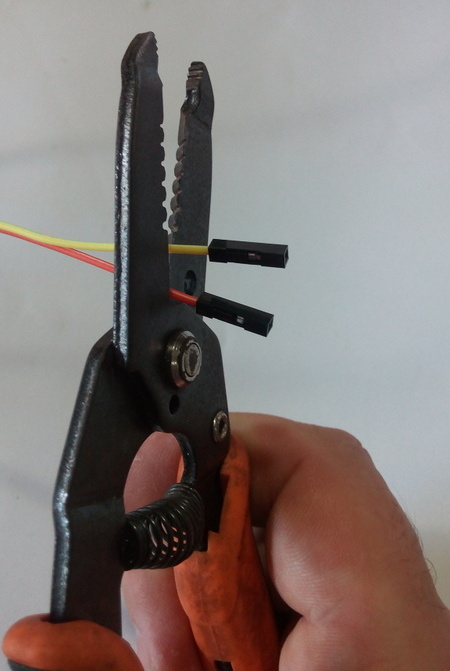

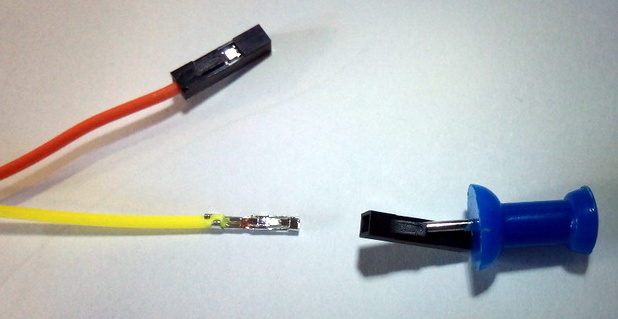
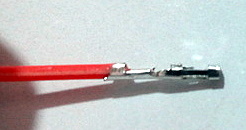
Cut both connectors off ONLY ONE end of the cable 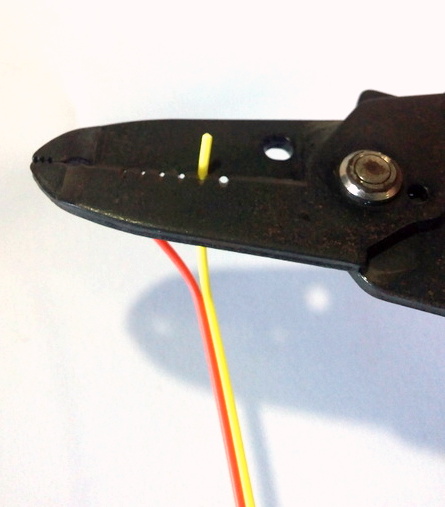
Strip about 1mm of plastic off the end of the wires
Be careful not to damage the little strands of copper inside.
Always use the correct hole size,
and always pull straight (never at an angle)
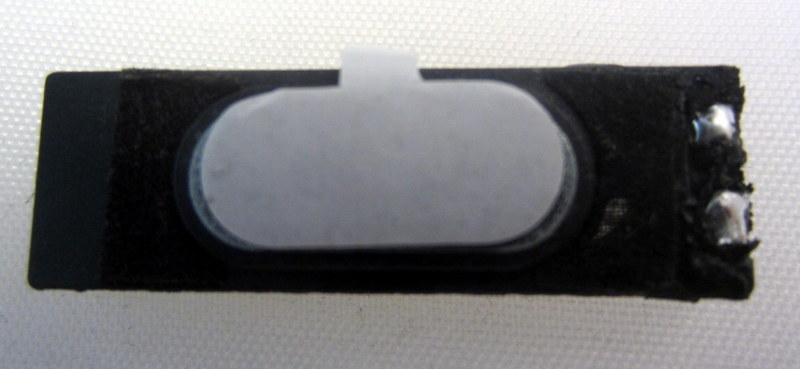
Unsolder the black and red wires from the speaker
(You will have to melt through the black plastic coating on the solder)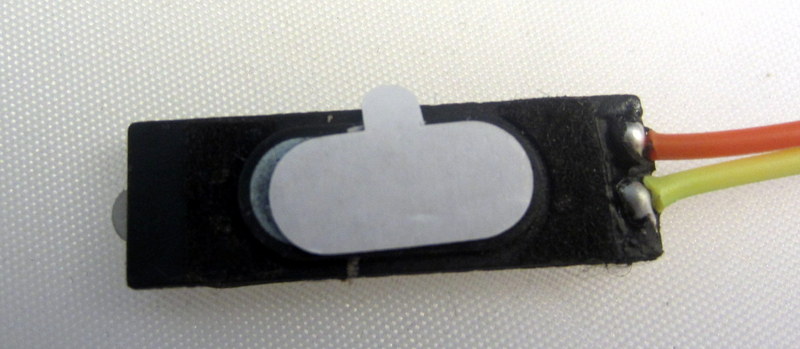
Solder the new wires onto the speaker
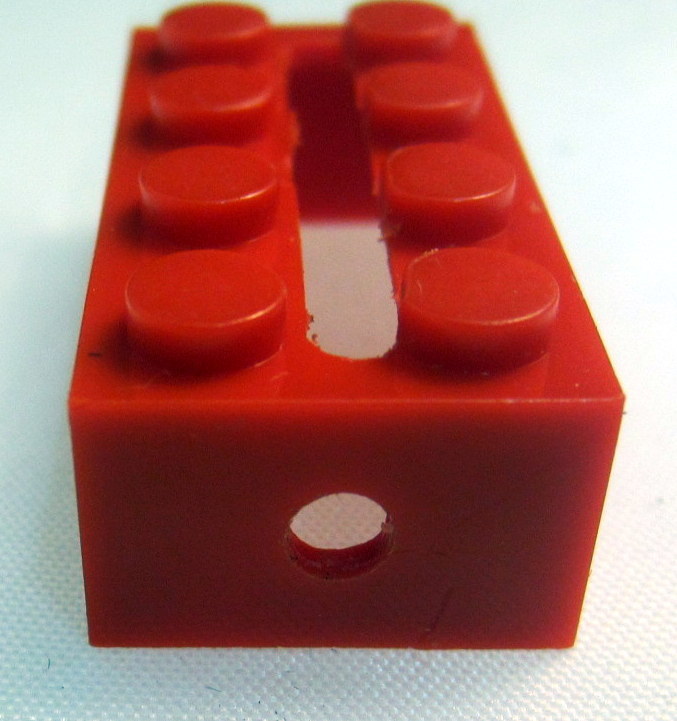
Drill a 3.5mm hole in the middle of the end of the 2x4 block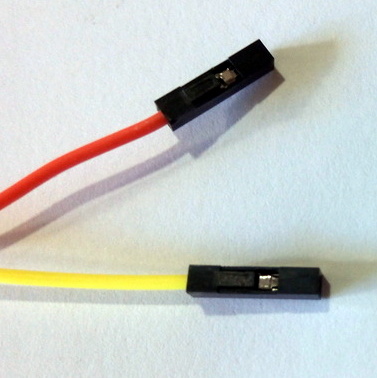
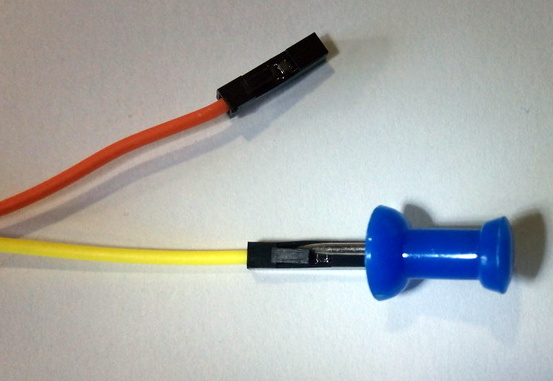
Use a pin to bend the little black plastic "tongue" up
Gently slide the plastic housing off the end of the wire
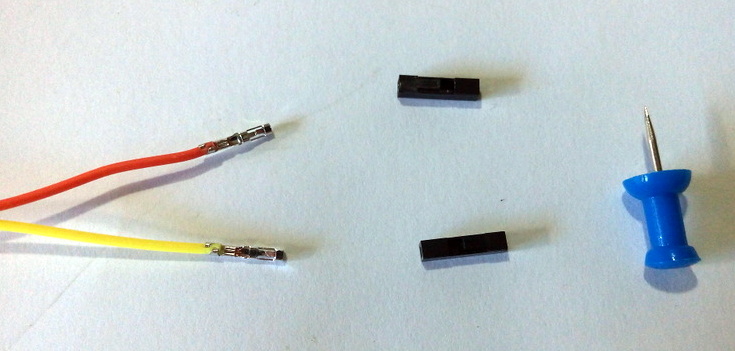
Remove both of the black plastic housings from the ends of the wires
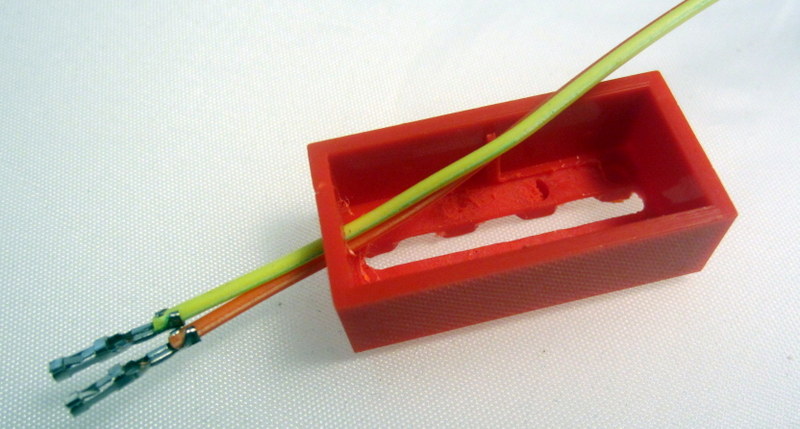
Push the wires through the hole 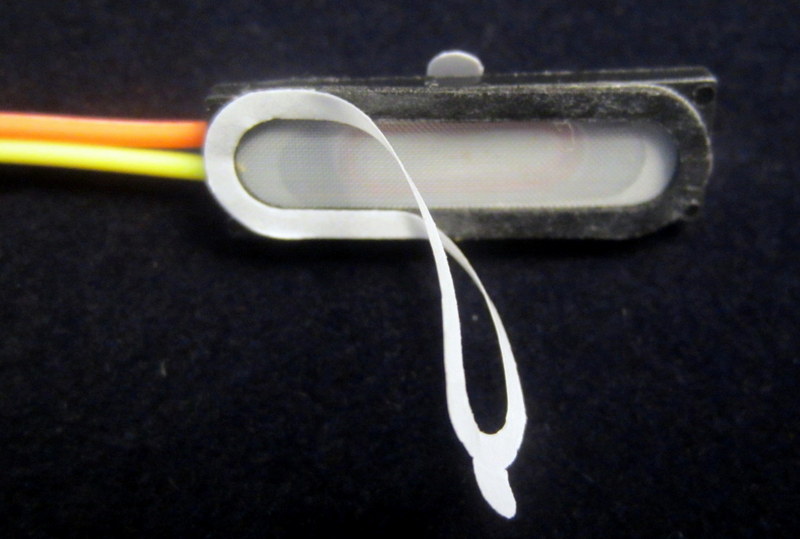
Remove the white sticker backing
(Try not to touch the sticky foam) 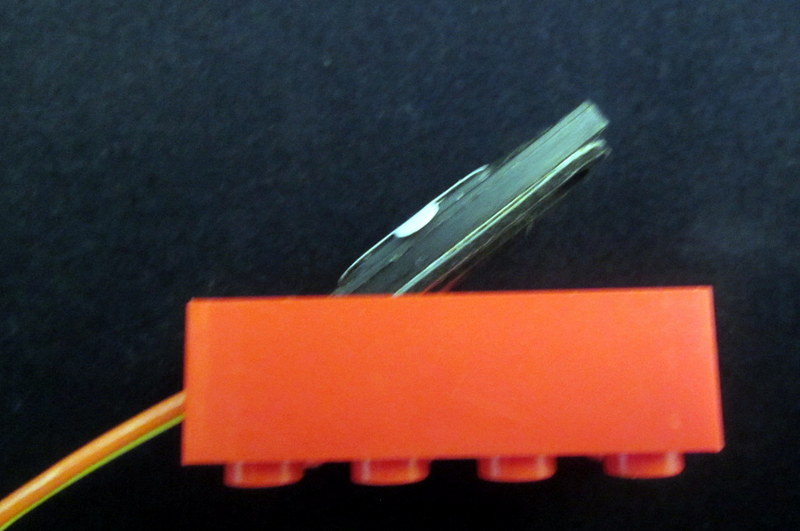
Pull the wires until the speaker is almost in the brick
Then carefully and firmly press the speaker into place

Glue around the edges of the speaker,
and make sure the wires are completely covered in glue
Do not fill the brick with glue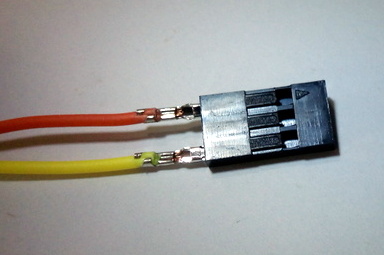
Slide the wires into the new 3 pin plastic housing
One wire on each side (no wire in the middle)
Make sure you push the wires in until you hear and feel them click
Gently tug on each wire to make sure it has clicked into the housing.
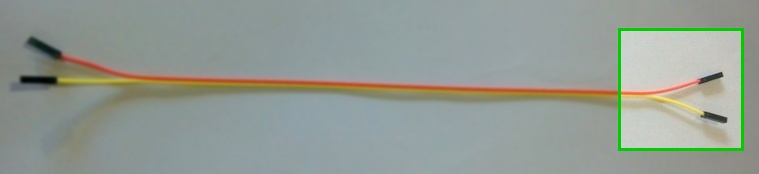
You're done! Your BeepBloX should look like this.
Connection Diagram
The BeepBlock can be connected to any Digital Pin
(D0 & D1 should not be used as they reserved for USB communication)
If it is connected backwards no damage is done, it works both ways.

Hints
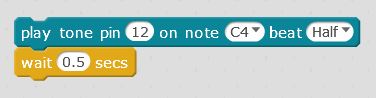
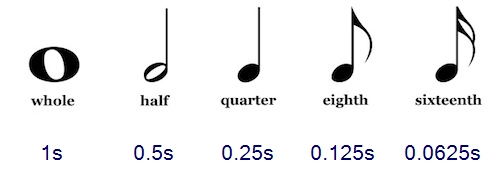
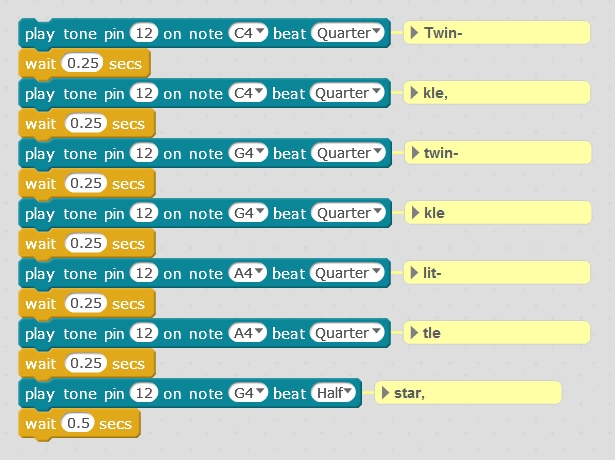
This plays middle C for half a second (500ms)
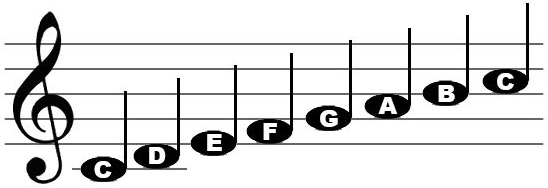
C4 note is middle C
A whole note is 1 second long. (This gives a tempo of 240 BPM)
You need to add a wait after each note - unless using Arduino mode
Advanced

You can replace the note with an exact freqency in Hertz (Hz).
You can also replace the beat (note length) with an exact time in milliseconds (ms).
Humans typically can hear from about 20Hz - 20,000Hz
The BrainBlock can create tones between 31Hz - 65,535Hz
Higher frequencies (above 10kHz) will work, but may also produce strange clicking noises.
Sound Effects
You can create fun sound effects using loops and variables
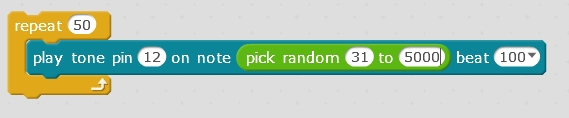
"Robot sounds" 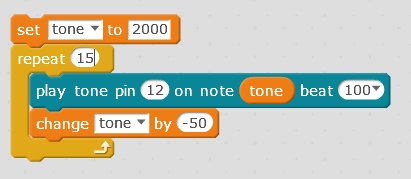
"Falling"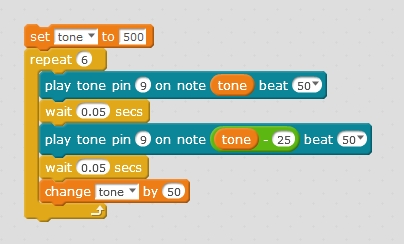
"Magic"
To produce sounds (other than beeps/tones) such as recordings, music, and voice requires
a MemoryBloX (SD card) connected to the BrainBloX.
BeepBloX + MemoryBloX = BeepBloX FX
Mini Challenges
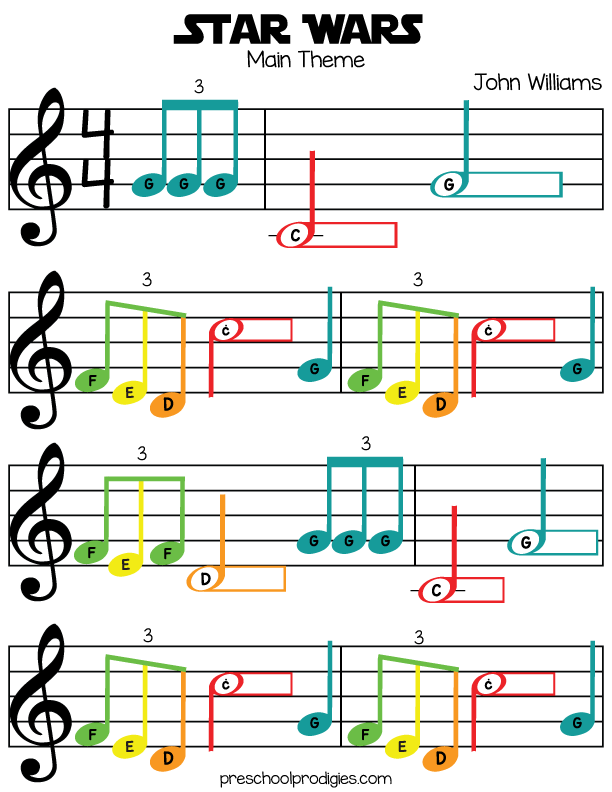
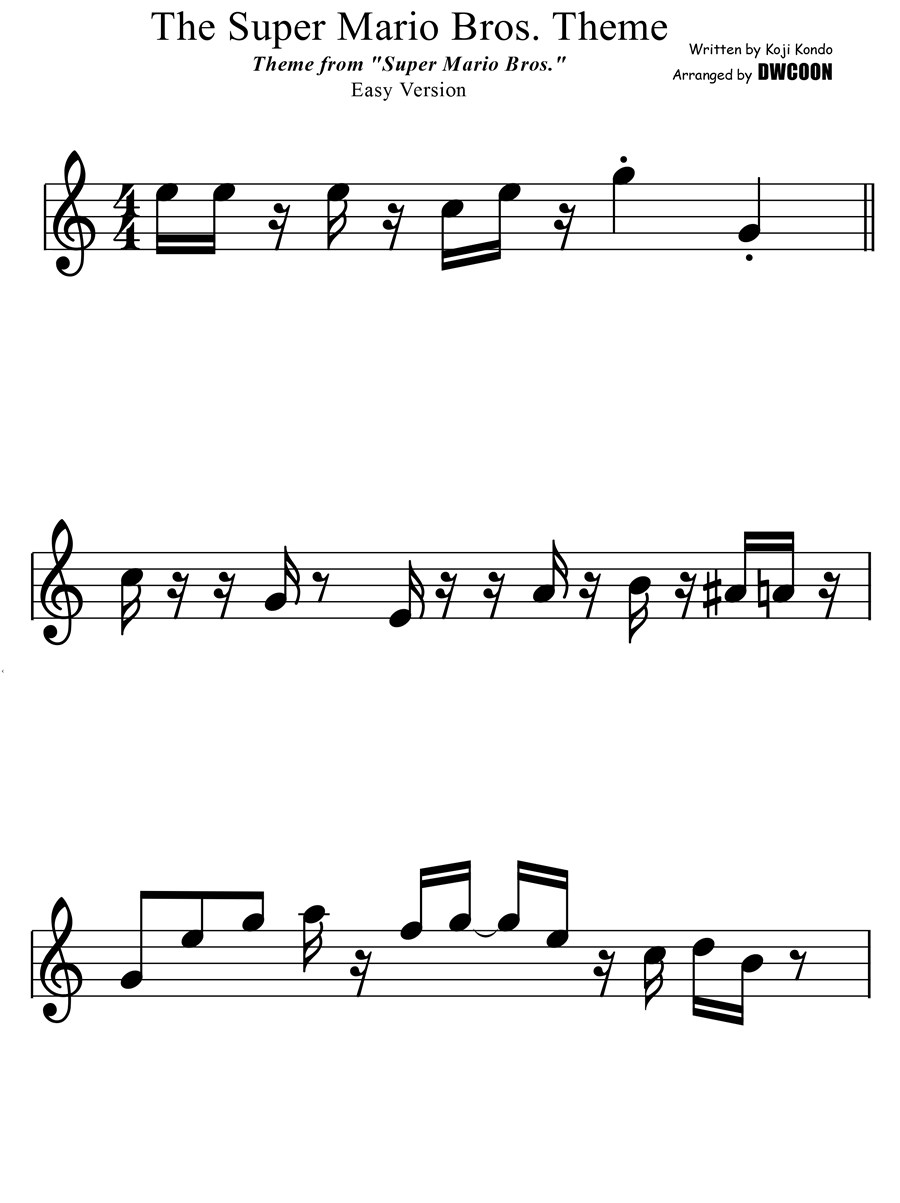
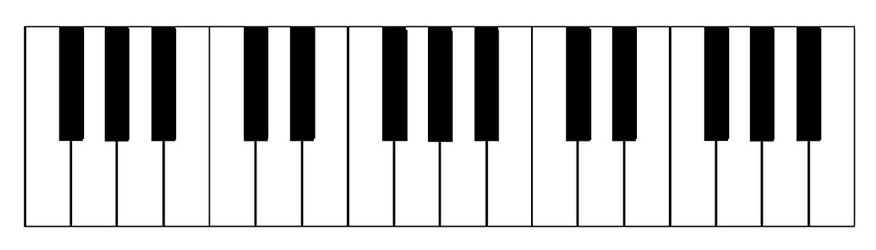
- Make a simple piano with at least 7 "keys" (sprites), each should play a note: C D E F G A B
- Make a siren alarm sound
- Make sprite play a song (like Twinkle Twinkle Little Star)
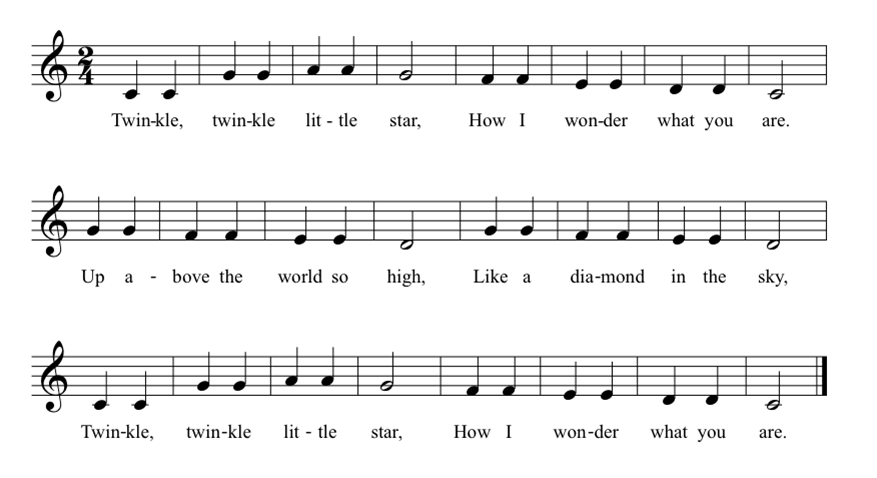
Sheet Music
Here are some more difficult songs: